Chapter 4
LEAPing In and Out of Your Website
The best part of leap™ is the “leap” itself. Unlike most web systems – which usually have a dis- connect between the pages the public surfer sees and the administration pages used to edit them – leap™ allows you easily get to the content you wish to change.
LEAPing In
An easy metaphor to understand is this: imagine you have a clothesline parallel to the street out- side. You hang up each article of clothing from the back side and see one side of the clothing. By ducking under the clothes line, you can now move back and forth on the side the street sees. By ducking under again, you are now on your “administration” side again.
At the end of the day, there are three ways to get to the “administration” side of leap™ (e.g. “leaping” into your website).
- Type the word “leap” (or your other assigned keyword) into your keyboard. Your cursor must
be in the window, or the browser doesn’t know you are speaking to it. You may need to click some-
where inside the website window (Not on a link! for obvious reasons) to center your cursor in the
window before typing “LEAP.”
- Add the path “/leap” (or your other assigned keyword) to your page name. If the “leap”
keyword doesn’t work for some reason, you can easily change the name of the page.
For Example:
- http://www.treefrog.ca/BuyLEAP, the public page, becomes…
- http://www.treefrog.ca/LEAP/BuyLEAP the administration page.
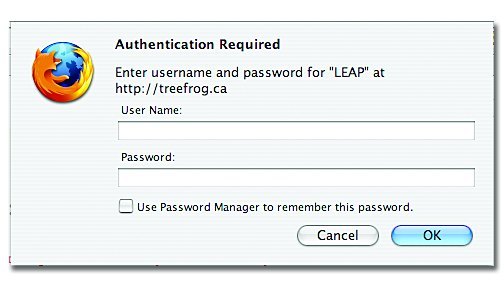
- Press the leap button. If you have a USB leap button, you can easily press the button to hop back and forth. Once you are on the administration side of your website, you will be prompted for your username and password. Enter them and press OK.

You are now logged into the leap™ Administration side of your website and you should see all of the modules and a menu bar at the top of the page.

LEAPing Out
To leap™ back to your public website view at any time, you can:
- Type the word “leap” (or your other assigned keyword) into your keyboard. Your cursor must be in the window, or the browser doesn’t know you are speaking to it. You may need to click somewhere inside the website window (Not on a link! for obvious reasons) to center your cursor in the window before typing “leap.”
- Remove the path “/leap” (or your other assigned keyword) from your page name.
- Press the leap button. If you have a USB leap button, you can easily press the button to hop back.
Adding a Page
One of the best parts of leap™ is the ability to quickly and easily add unlimited numbers of pages to your website.
Caution: Please ensure that you read the section on Page Names before adding a page to your website.
To add/create a page on your website
- Log into the administration side of your website (see section on leaping into your website).
- Navigate to the page you would like to have by adding in your new page name after the “/” in
your URL. For example, if you want to create the page “test5” at http://www.treefrog.ca/, you
would simply add the word “test5” after the “/” in the URL (i.e. http://www.treefrog.ca/test5).
- You will either be brought back to the public side of your website (away from the LEAP™
Administration side) to a new page with a warning message on it - something to the effect of
“Warning, this page has moved” OR to a blank page. Not to worry.
- leap™ back into your website (see instructions on leaping into your website).
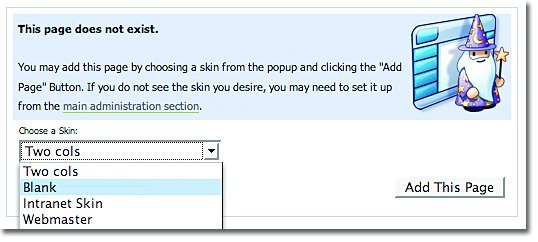
- Under the Choose Skin field, select the name of the skin that you wish to use on this web- site page. Note: Unless you have purchased multiple design layouts or skins, there should only normally be two skins to choose from in this list and it should be called “Main” or “Inside” skin. Main is your homepage look and feel and Inside is your interior page look and feel.

- Press the Add This Page button.
- You will be brought to your new website page, ready for content to be inserted into it.
Tip! Check out this handy walk-through for adding pages!
Page Names
Naming your website pages are a critical part of using your website. When creating page names, REFRAIN from the following:
- Using characters in your page name such as %, @, &.
- Naming a page something that you would not want your customers to see, as your customers will see your page name when they navigate to your page.
- Choosing names that are excessively long. Using names that do not relate to the content of that page.


